Category: Web Server

Web Server Stuff

  • Set Timezone for MYSQL / PHP

    After setting system time, I discovered that mysql and php services didn’t also update the timezone settings. Here’s how to make sure they also reflect the correct timezone.

    First locate all the php.ini files in /etc

    cd /etc/
    find . | grep php.ini
    ./php/7.4/apache2/php.ini
    ./php/7.4/cli/php.ini

    now edit these files and add the timezone info

    nano ./php/7.4/apache2/php.ini

    add this to the [Date] block:

    [Date]
    date.timezone = "America/New_York"

    For mysqld portion, first copy timezone data into mysql tables:

    mysql_tzinfo_to_sql /usr/share/zoneinfo | mysql -u root mysql
    

    Now edit the mysqld.cnf file:

    nano /etc/mysql/mysql.conf.d/mysqld.cnf

    And add this to the [mysqld] block:

    [mysqld]
    default-time-zone='America/New_York'
    

    Finally do a service restart:

    systemctl restart mysql
    systemctl restart apache2

    That’s It, Enjoy!

  • Simple HTTP Basic Auth on Apache2

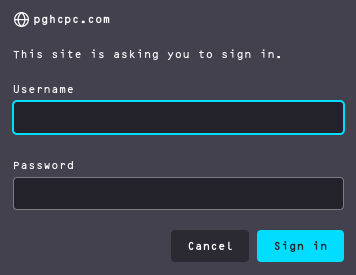
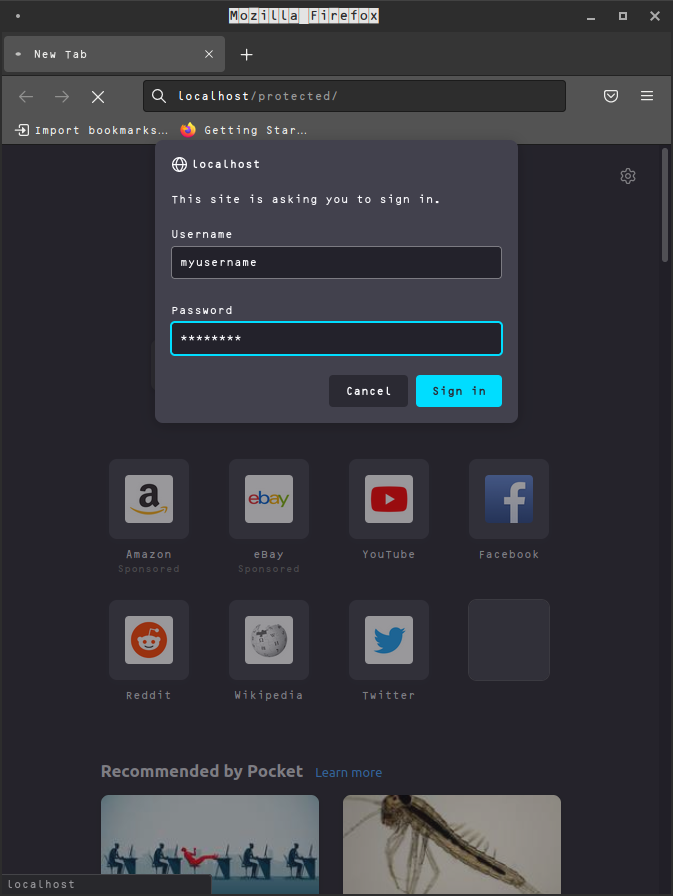
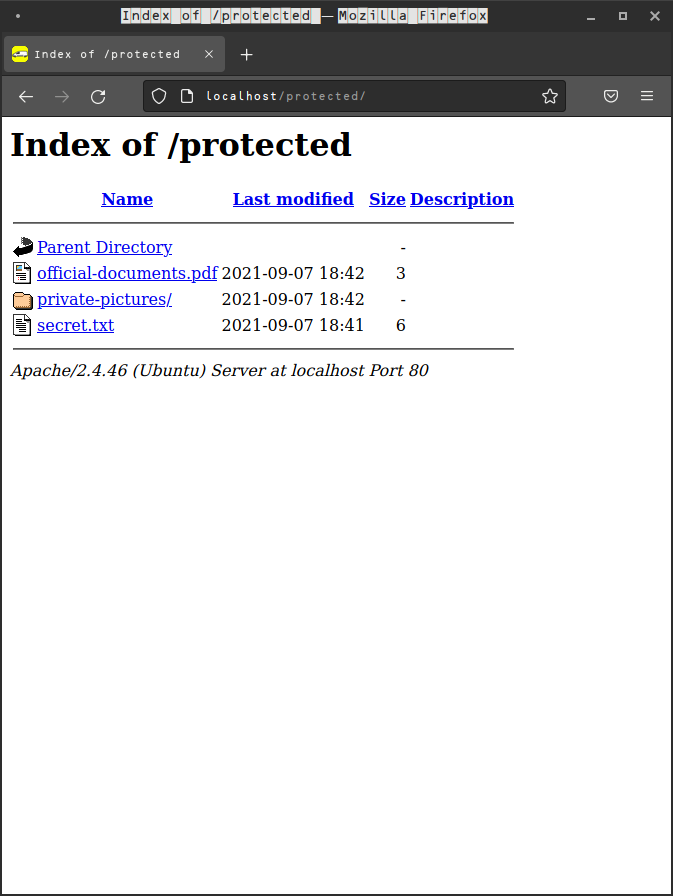
    Say you want to create a simple password protected folder in order to share some sensitive documents or what have you. Using apache2 and HTTP Basic Auth, this can be accomplished in only a few commands.

    An Example of simple HTTP Basic Auth Login

    First, create a folder in your web directory.

    sudo mkdir /var/www/html/protected

    Then, you will want to setup the username/password you want to use for the login.

    sudo htpasswd -c /var/www/basic_auth_passwords myusername

    The above command creates a file called basic_auth_passwords in /var/www, and will prompt you for the password for “myusername”, like below:

    New password: 
    Re-type new password: 
    Adding password for user myusername

    Make sure this file is not located in your webserver’s html directory, accessible to the outside world, but is in a location apache can read.

    Next, we will be adding the directives to an .htaccess file located in the protected directory.

    Remember to add the correct “AllowOverride” directive in your sites-enabled .conf file if you are running your own web server, such as:

    <Directory /var/www/html/protected/>
        AllowOverride All
    </Directory>

    Here’s a quick example of editing your default .conf file that will be present after a fresh install:

    sudo nano /etc/apache2/sites-enabled/000-default.conf

    And have something like this inside that file:

    <VirtualHost *:80>
        ServerAdmin webmaster@localhost
        DocumentRoot /var/www/html
        <Directory /var/www/html/protected/>
            AllowOverride All
        </Directory>
        ErrorLog ${APACHE_LOG_DIR}/error.log
        CustomLog ${APACHE_LOG_DIR}/access.log combined
    </VirtualHost>

    So, now that we are certain the .htaccess file will work as intended, we can create it in the protected folder:

    sudo nano /var/www/html/protected/.htaccess

    And have the following inside the file:

    AuthType Basic
    AuthName "Restricted Files"
    AuthBasicProvider file
    AuthUserFile "/var/www/basic_auth_passwords"
    Require valid-user

    Next, we will want to restart apache to make sure the changes take effect:

    sudo systemctl restart apache2

    Now, we can put all the files we want in our protected folder, and the browser will prompt for the login we created before allowing access:

    Basic Auth Login Screen

    After logging in we will be able to access our protected files:

    Example Protected Folder

    For more information consult the apache docs.

    Thanks for reading, and good luck with your HTTP Basic Auth protected files and folders!